Dog proofing your home works best when you start with the space a new dog can actually reach, not with a generic list of everything that might exist in a house. Define the initial access area, inspect it from dog height, then remove, secure, block, or supervise anything that creates a realistic chew, swallow, escape, fall, or exposure risk. Puppies and dogs with unknown histories usually need a tighter first pass because their reach and habits are less predictable. The goal is not to make supervision unnecessary, but to reduce preventable hazards before curiosity finds them.
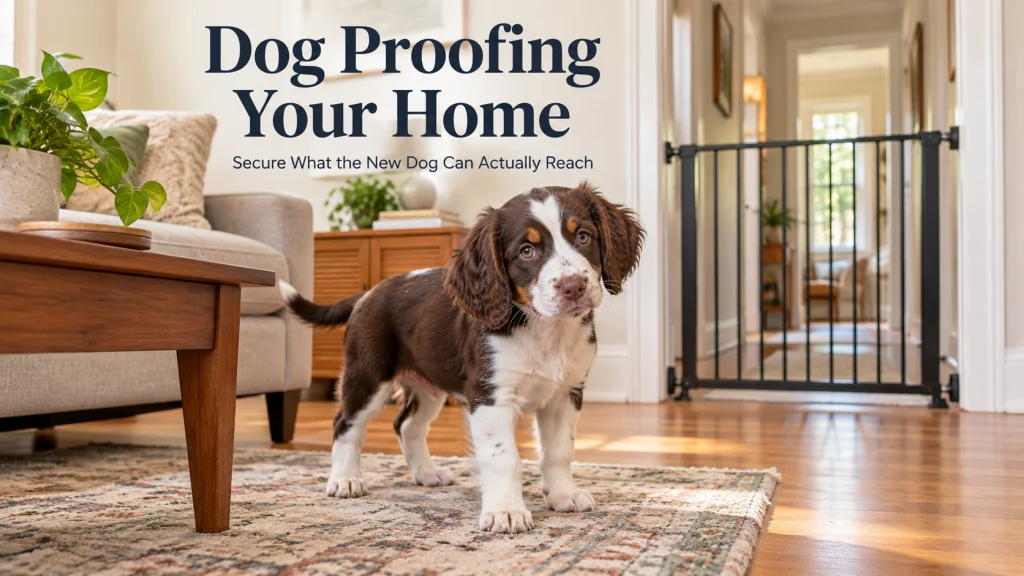
Start with the space your new dog can actually reach
The safest home is not the one where you plan to say no quickly enough. Dog proofing your home starts by deciding where the dog can go, then inspecting everything inside that area before the dog arrives. That keeps the job practical because a closed bedroom creates a different risk picture from an open kitchen, stairway, mudroom, and yard. It also fits the broader work of bringing home a new dog without turning every room in the house into an immediate project.
For the first access footprint, include the routes between resting space, water, exit door, family activity, and any outdoor area the dog will use. Then compare that footprint with your preparation plan for a new dog so access and supervision expectations match what the household can actually manage. A dog that will stay mainly in one prepared area needs a deep inspection of that area and the paths leading out of it. A dog that will have broad access from the start needs the same inspection repeated across every reachable room rather than a quick whole house glance.
Decide which spaces should be accessible at first
Access should be based on what the household can prepare and supervise, not on how much freedom feels generous. Close doors to rooms that are difficult to clear, use existing barriers where they are appropriate, and simplify the first route through the home. If a room contains open storage, exposed cables, fragile items, a busy doorway, or several places where a dog can disappear from view, there is no advantage in making it available immediately. The practical question is whether the space is ready for the dog you are bringing home today.
Containment choices themselves belong in the separate guide to setting up a home for a dog, so this inspection should stay focused on access and hazards rather than product selection. A closed door may be enough for one household, while another may need a properly fitted barrier because the route must remain open for people. Whatever method you use, check that it does not create a new problem such as a gap, unstable placement, or an easy climbing point. Treat the boundary as part of the environment that must be inspected, not as a substitute for inspection.
- Living areas: check low tables, loose objects, cords, plants, furniture gaps, and anything that can be pulled down.
- Kitchen and dining areas: check food access, trash, low cabinets, cleaning products, bags, and reachable counters or table edges.
- Bathroom and laundry areas: check medication, toiletries, cleaners, laundry, trash, cords, and anything temporarily placed on the floor.
- Bedrooms and work areas: check charging cables, small personal items, bags, shoes, office supplies, and storage under furniture.
- Entryways and outdoor routes: check doors, stairs, gates, fence gaps, tools, yard products, plants, and the path used for arrivals and departures.
This first map should be simple enough that everyone in the household can follow it. If different people assume different access rules, a door left open can undo an otherwise careful setup. The safest version is the one the household can maintain consistently. Once the dog shows reliable habits and you have inspected more space, access can expand deliberately.
Inspect the floor and low surfaces for chew and swallow hazards
Do the inspection from the dog’s likely eye and mouth level instead of standing in the middle of the room. Look under tables, along baseboards, behind furniture, beside beds, under desks, and near charging areas where small objects can collect. A coin, hair tie, children’s toy piece, loose fastener, sock, craft item, or dropped packaging can be easy to miss from adult height. The point is not to predict exactly what the dog will choose, but to remove objects that are small, loose, chewable, or easy to pull into the mouth.
Size and body type change what counts as reachable. A small puppy may fit under furniture that blocks a larger adult dog, while a tall dog may reach a side table or counter edge that seemed irrelevant during the floor check. Known history matters too, because an adult dog with a record of leaving household objects alone may need less intensive management than a puppy or newly adopted dog whose habits are still unknown. Start conservatively when you do not know how the dog investigates a new environment, then revise the setup from observed behavior rather than assumptions.
Secure cords, trash, low storage, and movable objects
Electrical cords deserve special attention because chewing can create an injury and electrical hazard, and owner improvisation can make that risk worse. Move unplugged loose cords out of reach when possible, route active cords where the dog cannot access them, and keep power strips and cable bundles out of the dog’s ordinary path. Do not splice, alter, or repair electrical equipment as part of dog proofing unless the work is within your competence and the equipment guidance allows it. If the only solution requires electrical modification, stop at environmental management and use qualified help.
Trash, open baskets, low cabinets, and light movable objects create a different problem because smell and motion can make them interesting even when the contents look boring to people. Put trash behind a reliable barrier or in a location the dog cannot access, and check whether low doors can be nudged open rather than assuming a closed cabinet is secure. Move bags, laundry, recycling, cleaning supplies, and stored items away from the dog’s reach if the container itself can be tipped, dragged, or chewed. A room is not truly cleared when the hazard is merely hidden inside something the dog can open.
Separate food, medication, chemical, and plant hazards from ordinary clutter
Food, medication, household chemicals, and plants should not be treated like ordinary mess because the consequence of access may depend on the exact substance and amount. Store these items where the dog cannot reach them, and do not rely on a familiar container, a closed cap, or a high surface unless the storage is genuinely inaccessible to that dog. When you are uncertain about a plant, food, medication, or household substance, verify the exact item with an appropriate veterinary or poison control source instead of guessing from a general list. That keeps the article’s job clear: prevent access first, leave toxicology assessment to the sources qualified to make it.
Daily routines matter as much as permanent storage. A medicine cabinet is useful only if pills are not later left on a nightstand, and a locked cleaning cabinet does not help if a bottle is set on the floor during chores. Check the places where items pause during normal life, such as grocery unloading areas, backpacks, purses, bathroom counters, laundry spaces, and food preparation surfaces. Dog proofing should account for those temporary moments because many household risks appear when something is in use, not when it is stored correctly.
Warning: If you think a dog has swallowed or been exposed to a potentially harmful substance, do not use this checklist as treatment guidance. Contact a veterinarian or an appropriate animal poison control service for case specific instructions.
Check doors, stairs, balconies, and escape routes
Physical access hazards are easy to overlook when the room itself is tidy. Walk the route a person will use to enter, carry groceries, answer the door, move laundry, or let the dog outside, and notice where an open door could create a direct path away from the supervised area. Check windows, balcony access, stair openings, and any door that does not latch consistently. The important question is whether normal household movement can accidentally give the dog access to a place you intended to keep closed.
Stairs and raised areas deserve a condition based decision rather than a blanket rule. Age, size, mobility, confidence, surface traction, and the ability to supervise can all change whether access is reasonable. If a balcony, railing, stair opening, or structural feature has gaps or instability that concern you, block access and get appropriate structural guidance instead of improvising a fix around the dog. Environmental management is useful here because it gives you a safe boundary while you decide whether the underlying space needs repair or a different long term setup.
Check the accessible yard and every gate the dog may use
Outdoor dog proofing should start with the exact area the dog can enter, not with the assumption that a fenced yard is automatically secure. Walk the perimeter and check gates, latches, gaps, loose boards, openings under fencing, stored tools, cords, chemicals, standing containers, and objects that could be climbed or knocked over. Consider the dog’s size and body shape when judging a gap, because an opening that is irrelevant for one dog may be usable by another. If the boundary is damaged or unstable, restrict access until the structure is repaired rather than trusting supervision to compensate for a weak perimeter.
Plants and yard products need the same evidence boundary as indoor substances. Do not identify a plant as safe or toxic by appearance alone if you are uncertain, and follow the product label for any lawn or garden material used where the dog may have access. Keep the dog away from areas that cannot yet be verified or safely managed. A prepared yard still needs supervision, especially while you learn whether the new dog digs, squeezes through gaps, climbs, jumps, or fixates on items you did not expect.
Use a tighter proofing pass for puppies and dogs with unknown history
Puppies usually justify a more conservative first setup because mouth based exploration, small body size, changing reach, and limited household experience can expose weak points quickly. That does not mean every puppy behaves the same, but it does mean you have less evidence about what the individual dog will ignore. A compact access area that has been checked carefully can be easier to manage than broad freedom through several rooms. Pair that approach with a separate new puppy checklist so proofing does not replace the other preparation tasks that happen before arrival.
A newly adopted adult dog may arrive with better physical control than a puppy but still have an unknown history around trash, counters, cords, doors, or household objects. Do not assume age automatically equals reliable house behavior, especially during the first period in an unfamiliar environment. Start with a conservative access plan, then relax individual controls only after the dog has shown what it tends to investigate and how it behaves in the space. This approach avoids both extremes: treating every adult dog like a puppy forever or granting full access before you know the dog’s habits.
Choose whether to remove, secure, block, or supervise each risk
A room list becomes more useful when every concern leads to an action. Remove an item when it does not need to be in the dog’s space, secure it when it must stay but can be made inaccessible, block the area when the whole zone is not ready, and supervise when access is necessary but behavior is not yet predictable. These actions are not ranked from best to worst because the right choice depends on the hazard and the household. The goal is to use the simplest reliable control that fits normal life.
Supervision should not be the default answer for every preventable problem. Watching closely can help while a dog learns the home, but people get distracted, routines change, and the dog may move faster than expected. If you can remove a loose object or move medication to inaccessible storage, that is usually more dependable than planning to intervene before contact. Save active supervision for situations where the dog reasonably needs access and the environment cannot be simplified further without disrupting normal use.
| Action | Use it when | Practical example |
|---|---|---|
| Remove | The item does not need to remain in the accessible space. | Move small loose objects off the floor and low tables. |
| Secure | The item must stay, but access can be reliably prevented. | Store medication or cleaning products in inaccessible closed storage. |
| Block | The whole room, route, or area is not ready for dog access. | Keep a workroom or unfinished storage area closed. |
| Supervise | The dog needs temporary access while you are still learning behavior or managing a condition. | Watch closely during the first uses of a prepared yard. |
Run the matrix room by room and write down the few items that still depend on supervision. That makes weak points easier to see because a room with ten supervised risks is probably not as prepared as it seems. If one action is hard to maintain, choose another that the household can follow consistently. Reliable routine matters more than an elaborate setup that fails during ordinary use.
Know when a hazard needs professional or manufacturer guidance
Ordinary dog proofing ends when the fix becomes a toxicology, electrical, structural, medical, or product safety question. If you need to know whether a substance is harmful after exposure, contact a veterinarian or animal poison control service rather than trying to calculate risk from a household checklist. If an electrical cord, outlet, appliance, railing, fence, balcony, or other structure is damaged, keep the dog away and use the appropriate qualified professional when repair is needed. The owner’s job is to identify the problem, stop access, and route it correctly.
Product instructions matter when a barrier, latch, appliance, cleaner, or other item has use limits that affect safety. Check the current label or manufacturer guidance instead of assuming a generic installation or use method applies to every model. Do not modify products in ways that defeat their intended function just to make them fit a room. A simple temporary boundary is often the better choice while you verify compatibility or arrange a proper repair.
Escalate rather than improvise: Suspected harmful exposure belongs with veterinary or animal poison control guidance, electrical damage belongs with appropriate electrical expertise, structural defects belong with qualified repair help, and product specific questions belong with the current manufacturer instructions. In each case, the immediate owner task is to stop access and avoid making an uncertain hazard harder to assess.
Recheck the home when the dog reveals new reach or new habits
Dog proofing is not finished just because the first inspection looked thorough. A puppy grows, an adult dog becomes more comfortable, furniture moves, holiday items appear, and a dog that ignored a shelf may later discover it can reach the edge. Treat new chewing, climbing, counter access, cabinet interest, or escape attempts as information about the environment. Change the setup first, then decide whether training or a longer term management adjustment is also needed.
Recheck the specific route where the behavior occurred and look one step beyond the obvious item. If a dog reached a cord under a desk, inspect the whole desk area rather than replacing only that cord. If the dog opened a low cabinet, check other similar doors and any new contents behind them. This is how the proofing plan stays proportional to the actual dog instead of becoming either complacent or unnecessarily restrictive.
Final thoughts: reduce hazards before relying on behavior
A useful dog proofing plan starts with access, not with a giant list of household dangers. Decide where the dog can go, inspect that footprint from dog height, and use removal, secure storage, blocking, or supervision according to the specific risk. Puppies and dogs with unknown histories deserve a more conservative starting point because their reach and habits are still being discovered. As the dog shows reliable behavior, you can expand access without pretending the first setup must last forever.
The strongest setup also knows its limits. Toxic exposures, damaged electrical systems, structural problems, and product specific safety questions need the appropriate veterinary, poison control, professional, or manufacturer guidance. Keep those boundaries clear and use the home inspection for what it does well: reducing preventable access before an ordinary household object becomes a problem. That is a more reliable safety strategy than expecting perfect behavior in a brand new environment.
FAQs
🐾 Do I need to dog proof every room before bringing a new dog home?
Not necessarily. Start with the rooms and routes the dog will actually access, keep unprepared areas closed, and expand access only after those spaces have been checked.
🔌 What should I do about electrical cords a dog can reach?
Move loose cords out of reach and route necessary cords so the dog cannot access them. If the situation requires electrical repair or modification, block access and use appropriate professional guidance rather than improvising a fix.
🗑️ Is a lidded trash can enough for a curious dog?
Only if that specific dog cannot tip, open, drag, or reach it. If you are unsure, place the trash behind a reliable barrier or in inaccessible storage instead of relying on the lid alone.
🌿 How do I know whether a houseplant is safe for my dog?
Verify the exact plant with a veterinary or animal poison control source rather than identifying safety from appearance or memory. Until you are sure, keep the plant outside the dog’s accessible area.
🚪 Should an adult rescue dog get more freedom than a puppy?
Age alone should not decide access. A known adult with reliable household history may need less intensive management, while a dog with unknown habits is safer starting with a smaller prepared footprint.
🏡 How often should I recheck dog proofing?
Recheck whenever the dog’s reach, behavior, access, or the household setup changes. New chewing, climbing, cabinet interest, escape attempts, or moved furniture are all reasons to inspect the affected area again.
References and sources
- ASPCA Animal Poison Control household products guidance: supports the boundary around household substances and the need for case specific poison guidance after a suspected exposure.
- ASPCA plant database: supports verifying the exact plant rather than guessing whether a plant is safe for a dog.
- American Kennel Club puppy proofing guidance: supports checking cords, medication, small objects, trash, indoor access, and outdoor hazards before a puppy arrives.
- Zoetis dog proofing guidance: supports the room based inspection approach and tighter management for puppies in accessible areas.
- PetMD puppy proofing guidance: supports inspecting the home from a puppy’s perspective and checking what a puppy can eat, climb, enter, or pull down.