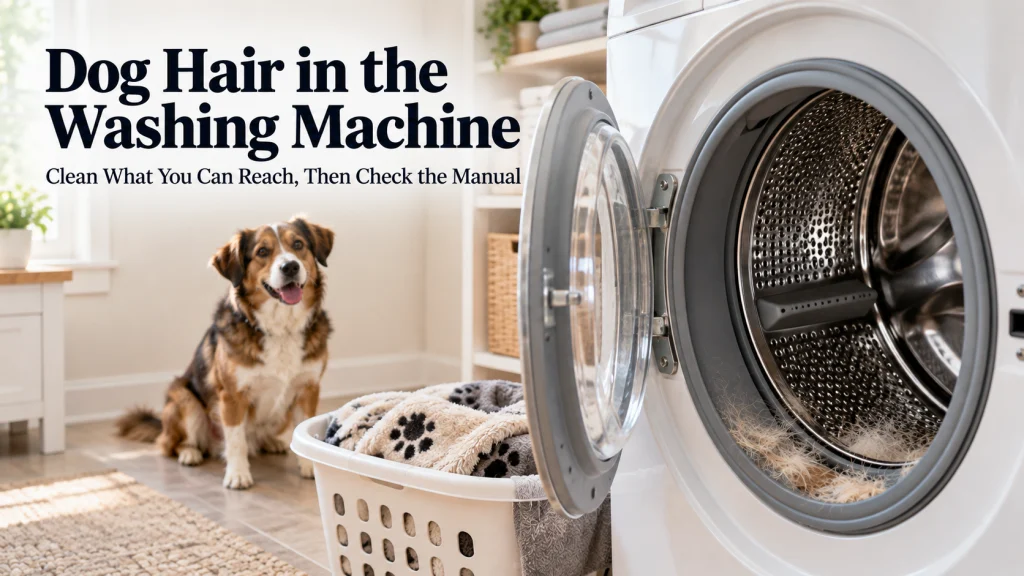
Dog hair inside a washing machine is best handled as an accessible cleanup problem first, not as a reason to open parts that may not be designed for owner service. Remove loose fur from reachable surfaces, follow the exact washer manual for cleaning cycles and filters, and treat every cleaner or additive as model dependent. Wet pet hair can clump and move into places that affect drainage, so prevention starts before the next load goes into the drum. The safest routine is simple: clean what you can clearly reach, verify anything model specific, and stop when the problem moves beyond normal owner maintenance.
Start with the parts your washer says you can reach
The moment fur is stuck around a drum or door gasket, another laundry hack is less useful than knowing what the washer was designed to let you clean. A normal household cleanup can include visible hair on the drum, door, lid area, gasket folds and other surfaces the manual treats as routine owner care. It should not turn into pump access, hose removal, panel removal or electrical troubleshooting just because hair may be somewhere deeper. That same boundary matters across keeping a home clean with dogs, where the practical goal is to solve the mess without creating a second problem.
For dog hair you can see inside the washing machine, start by separating visible buildup from symptoms that point to a drainage or service issue. A strand on the gasket and a washer that will not drain are not the same problem, even if both appear after a hairy blanket load. The broader dog hair removal routine can reduce how much fur reaches laundry equipment, but this page owns what to do once hair is already inside the washer. Keep that distinction clear and the cleanup becomes much easier to control.
| What you find | Owner level next step | Boundary |
|---|---|---|
| Loose hair on the drum, door or reachable gasket surface | Remove it from the empty machine and wipe the reachable area as the manual allows | Do not push tools into hidden openings |
| A cleaning cycle listed in the exact manual | Use the listed procedure and only the approved cleaner or method | Do not substitute a generic recipe |
| A filter identified as owner serviceable in the exact manual | Follow that model’s access and cleaning steps | Do not assume another washer has the same filter |
| Persistent drain trouble, leaks, electrical symptoms or an inaccessible clog | Stop routine cleanup and move to qualified service | Do not disassemble the machine |
The table is a boundary check, not a repair map. If a part is not clearly identified in your washer documentation as something the owner should access, leave it closed. That rule prevents a common mistake: treating a generic internet photo of a filter door as proof that your machine has the same layout. The manual for the exact model is the deciding document.
Remove dry, accessible hair before adding more water
Loose fur is easier to collect when it is not floating through another wash cycle. With the machine empty, look across the drum, around the door or lid area and along any gasket surface you can reach without forcing, stretching or opening a service panel. Pick up loose clumps by hand or with a dry cloth, and use a vacuum only if the washer instructions allow that approach around the area you are cleaning. The goal is to remove what is already detached, not to chase strands into ports, holes or hidden cavities.
This dry first step matters because pet hair becomes harder to manage once water helps it gather into wet clumps. A second rinse may move some hair, but it can also redistribute fur that you could have removed before adding water. If the machine still has standing water, do not treat that as a normal hair cleanup step or reach into unfamiliar drain components. Standing water belongs in the manual guided troubleshooting path, and persistent drainage trouble belongs with appliance service.
- Empty the washer completely before cleaning visible fur.
- Collect loose hair from the drum, door, lid area and reachable gasket surfaces.
- Keep tools out of drain openings, perforations and hidden cavities.
- Check the manual before using a vacuum, removing a part or starting a cleaning cycle.
- Stop if the washer is not draining normally or shows a fault that the owner instructions do not resolve.
Think of this checklist as the reset after a very hairy load. It removes the easy material first and gives you a clearer view of whether the remaining issue is ordinary residue or something the washer itself is reporting. That is more useful than immediately adding another chemical or running repeated cycles. Once the loose fur is gone, the next job is wiping the surfaces the manufacturer actually expects you to clean.
Wipe reachable interior surfaces according to the appliance instructions
A damp cloth is a practical next step for hair and residue left on surfaces you can plainly reach. Work across the drum and the visible door or lid area, then inspect the gasket if your washer has one and the manual treats it as an owner cleaning area. Do not dig behind the seal, insert sharp tools or pull the gasket farther than normal access requires. A strand that is visible is a cleanup target, while a strand that disappears behind an inaccessible part is a reason to stop probing.
The important distinction is access, not washer style. Front load machines often make gasket buildup obvious, while top load designs can collect debris in different places, but neither layout tells you by itself what can be removed safely. Use the exact model instructions to decide whether dispensers, removable inserts or other pieces are part of normal cleaning. If the manual gives no owner removal procedure for a part, wiping its exposed surface is safer than improvising a disassembly step.
After wiping, look again for loose fur that has shifted into view. Remove that material before running another load so it is not immediately carried back onto clothing or bedding. If the same visible buildup returns after each wash despite reasonable prevention, that pattern is useful information when checking the manual or arranging service. Repeated transfer can point to more retained debris than a surface wipe can reach.
Use the washer cleaning procedure only when the manual provides one
Many washers provide a cleaning cycle or a manufacturer defined procedure for cleaning the tub, but the details are not universal. The cycle name, whether the drum must be empty, which dispenser is used and whether a cleaner is permitted can all depend on the machine. Use the procedure supplied for your machine rather than copying settings from another brand or a similar looking washer. A cleaning cycle is useful maintenance only when it is being used as designed.
Running extra cycles is not a substitute for removing visible fur first. If clumps are sitting on the gasket or drum, take out what you can reach before asking the machine to move the rest through its water system. After the approved cleaning procedure finishes, inspect the reachable surfaces again and wipe away any hair that has been released. If drainage remains abnormal, do not keep repeating cycles in the hope that a clog will clear itself.
The details still vary by machine. Some washers use a dedicated cleaning cycle, while others call for a different maintenance process or restrict which cleaners can be used. Follow the instructions supplied for your washer instead of treating a generic cleaning recipe as the default. That keeps ordinary cleaning separate from repair work.
Find the filter only through the exact model manual
A washer may have a user accessible pump filter, a lint collection feature, another debris system or no owner serviceable filter in the location you expect. That is why a photo or video from another machine is not enough to guide access. Look up your washer model and check its maintenance instructions for terms such as filter, pump filter, lint filter, debris filter or maintenance, then follow only the procedure that matches your machine. If the manual does not identify a filter as owner serviceable, do not remove panels to look for one.
Hair can collect with other debris, so a serviceable filter may be relevant when the manual tells you it exists and explains how to clean it. The important part is not the filter name but whether the manufacturer treats it as routine owner maintenance and explains how to access it. Some machines route routine maintenance differently, and forcing access can create leaks, damaged seals or an incorrectly reinstalled component. When instructions are unclear, qualified appliance support is a better next step than guessing.
| Manual says | What to do |
|---|---|
| The filter is owner serviceable and cleaning steps are provided | Follow those steps exactly and reinstall the part as instructed |
| A filter exists but access requires service work or panel removal not assigned to the owner | Leave it closed and use qualified service if symptoms justify it |
| No matching filter procedure is listed | Do not copy access steps from a different model |
| The washer still will not drain after allowed maintenance | Stop routine cleanup and arrange service |
This decision card prevents one of the most expensive kinds of overconfidence: assuming every washer hides the same cleanable trap behind the same door. The manual may give you a simple owner task, or it may tell you that the relevant area is not part of routine access. Both answers are useful because they define what not to do. Hair buildup does not make disassembly safer.
Treat vinegar, bleach and washer cleaner as model specific choices
Vinegar, bleach, baking soda and washer cleaners are often presented online as interchangeable fixes for pet hair, but manufacturers may permit, limit or discourage them differently. Do not choose an additive because it appears in a general cleaning recipe. Check the washer instructions for the cleaning agent, location and procedure the machine supports. If the manual names an approved washer cleaner or gives a specific cleaning method, use that instruction rather than building a stronger homemade mixture.
This matters because the cleaning goal is not to dissolve hair inside the machine. The practical job is to remove loose fur, clean accessible residue and use the washer’s own maintenance process without damaging seals, finishes or internal parts. More chemical does not make the process more complete, and combining cleaners can create hazards unrelated to dog hair. When the documentation is silent or unclear, skip the additive until the manufacturer can confirm what is appropriate.
| Option | Decision rule | What not to assume |
|---|---|---|
| Vinegar | Use only when the exact washer instructions permit it for the intended cleaning step | Do not assume a common laundry hack is safe for every seal or component |
| Bleach | Use only in the concentration and location the washer instructions specify | Do not improvise amounts or combine it with other cleaners |
| Baking soda | Treat it as an additive that still needs manufacturer approval | Do not assume a household ingredient is automatically appliance safe |
| Washer cleaner | Use a cleaner type and procedure supported by the washer instructions | Do not assume every cleaner suits every machine |
The table is intentionally conservative because the washer design and manufacturer instructions decide the answer. It is better to leave a cleaner out than to use a popular recipe that conflicts with the washer documentation. Hair cleanup should reduce maintenance risk, not add a new chemical or compatibility problem. The manual remains the tie breaker.
Stop owner cleanup when the problem becomes a service issue
Visible fur on a gasket is ordinary cleanup; persistent drainage trouble is not. Stop escalating owner maintenance if the washer leaks, repeatedly fails to drain, displays an unresolved error, shows an electrical symptom or appears to have a clog behind parts the manual does not allow you to access. Do not remove a pump, hose or cabinet panel to prove that hair is the cause. At that point, the important fact is that the machine has moved beyond accessible cleaning.
Hair may be involved, but do not turn that possibility into a diagnosis. Coins, lint, fabric debris and other faults can also affect drainage, and the symptom alone does not tell you which component needs work. Record the exact model, the symptom shown by the machine and the owner maintenance steps you already completed, then use the manufacturer’s support path or a qualified appliance technician. That gives the next person useful information without adding damage from exploratory disassembly.
A good stopping rule is simple: if the next step requires access that the owner manual does not clearly describe, it is no longer this cleanup job. The same applies when a normal cleaning cycle cannot complete because the washer is already showing a fault. Repeating the cycle or adding more cleaner does not create access to the actual cause. A service boundary is part of good maintenance, not a failure to finish the task yourself.
Reduce loose fur before the next load reaches the washer
The easiest washer cleanup is the hair that never enters the drum. Before washing a dog blanket, bed cover, towel or hair covered clothing, remove as much loose fur as the fabric and care label allow while the item is still dry. Shaking, brushing, lint rolling or vacuuming can all be useful depending on the material and the tool that is safe for it. If you need a fuller fabric focused routine, the guide to removing pet hair from laundry before washing handles that job in more detail.
Prevention should match the actual source of the load rather than become a rigid schedule. A lightly covered shirt may need only a quick pass with a lint roller, while a blanket from a heavy shedding dog can justify more dry removal before it goes near the washer. Check care labels before using a dryer, brush, vacuum or other method on a specific textile. The target is not perfectly hair free fabric, but a load that is not carrying an avoidable mass of loose fur into the water system.
| Before washing | Why it helps | Next check |
|---|---|---|
| Remove loose fur while the item is dry | Less hair is available to clump inside the washer | Confirm the fabric care label allows the removal method |
| Wash only items that fit the machine and have enough room to move as intended | Overloading can make cleanup and rinsing less effective | Follow the washer and textile instructions |
| Inspect the drum and gasket after a very hairy load | Visible fur can be removed before it transfers to later laundry | Wipe reachable areas as the washer manual allows |
| Use the washer’s approved maintenance process when needed | The machine gets the cleaning process it was designed for | Do not substitute a generic additive recipe |
This prevention flow keeps the effort where it is most effective: on dry loose hair before it becomes washer debris. It also avoids turning every dog household into a strict appliance maintenance calendar that may not fit the machine or the amount of shedding. Watch the actual loads, visible buildup and washer instructions instead. Prevention and maintenance based on the washer instructions work better together than either one does alone.
Final Thoughts: keep excess fur out of the machine and maintenance inside the manual
Dog hair in a washer is usually easier to manage when you start with what is visible and reachable. Remove loose fur before adding more water, wipe surfaces the owner instructions allow you to clean, and use the machine’s own cleaning procedure when one is provided. Check any filter only through the exact model manual, because access and maintenance design vary. That sequence handles the common mess without pretending every washer is built the same way.
The other half of the solution happens before laundry goes into the drum. Removing loose fur from dry blankets, covers and clothing reduces the amount that can clump, transfer or reach the drainage system. If the machine develops persistent drain trouble, leaks, unresolved errors or inaccessible blockage, stop owner cleanup rather than opening service parts. The cleanest boundary is also the safest one: routine maintenance stays with the manual, and repair symptoms go to qualified service.
FAQs
🐕 Can dog hair clog a washing machine?
Yes, excess wet pet hair can clump with other debris and contribute to drainage problems. Reduce loose hair before washing, remove visible buildup afterward and use the exact washer manual for any filter or maintenance step.
🧺 Why is dog hair showing up on later loads?
Hair can remain on the drum, gasket or other reachable surfaces and transfer back to later laundry. Clean visible fur from the empty washer and follow the model’s approved cleaning procedure before assuming there is a hidden clog.
🧽 Should I wipe the washer gasket after a hairy load?
If your washer has a gasket that the manual treats as a routine owner cleaning area, wiping visible hair from the reachable surface is reasonable. Do not pull the seal apart, insert sharp tools or probe behind areas the manual does not tell you to access.
🔎 Where is the washing machine filter for pet hair?
There is no universal location or filter design. Look up the exact washer model and follow its manual, and do not remove panels or copy another model’s instructions if no owner serviceable filter procedure is listed.
🧴 Can I use vinegar to remove dog hair from the washer?
Only if the exact washer instructions permit it for the cleaning step you plan to use. Do not treat vinegar as a universal fix, and never improvise cleaner combinations.
⚠️ When should I stop cleaning the washer myself?
Stop when the problem involves persistent drainage trouble, leaks, electrical symptoms, unresolved error messages or access behind parts the owner manual does not authorize. At that point, use manufacturer support or qualified appliance service rather than disassembling the machine.
References and Sources
- Consumer Reports on pet hair and washers: Supports the explanation that wet pet hair can clump, stick to washer surfaces and contribute to drain pump problems, along with reducing hair before washing.
- Maytag washer pet hair cleanup guidance: Provides a manufacturer example for removing accessible hair, wiping reachable surfaces and checking the exact manual for filter location and approved cleaning steps.