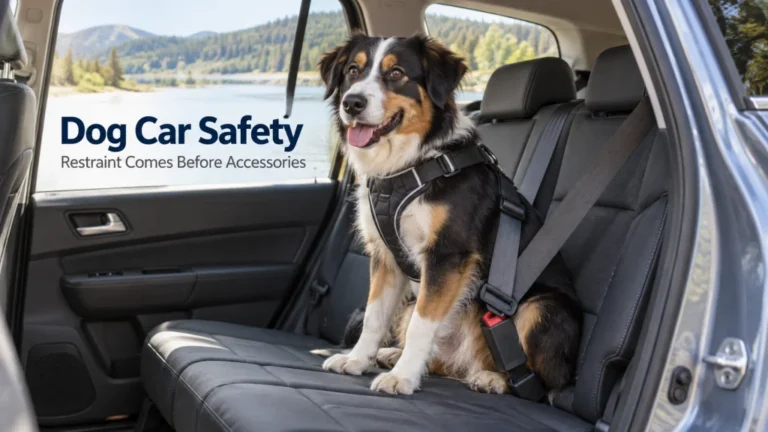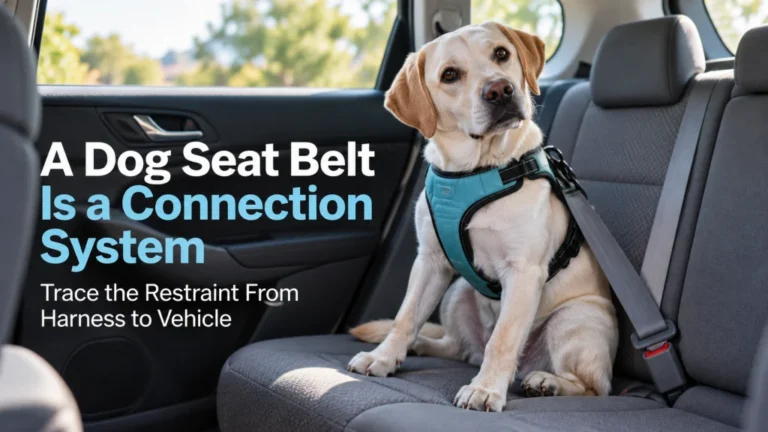
A dog car barrier can help define where a dog is allowed to ride, but the right choice depends on the vehicle opening, mounting method, sight lines, ventilation and the individual dog’s behavior. A barrier that stays secure during ordinary driving is doing a containment job, not automatically proving that it can manage crash forces. Measure the space first, test the installed barrier for movement, and treat any crash or load claim as a separate item that needs evidence for the exact model. If crash protection is the goal, plan the dog’s restraint separately rather than assuming a divider can do both jobs.
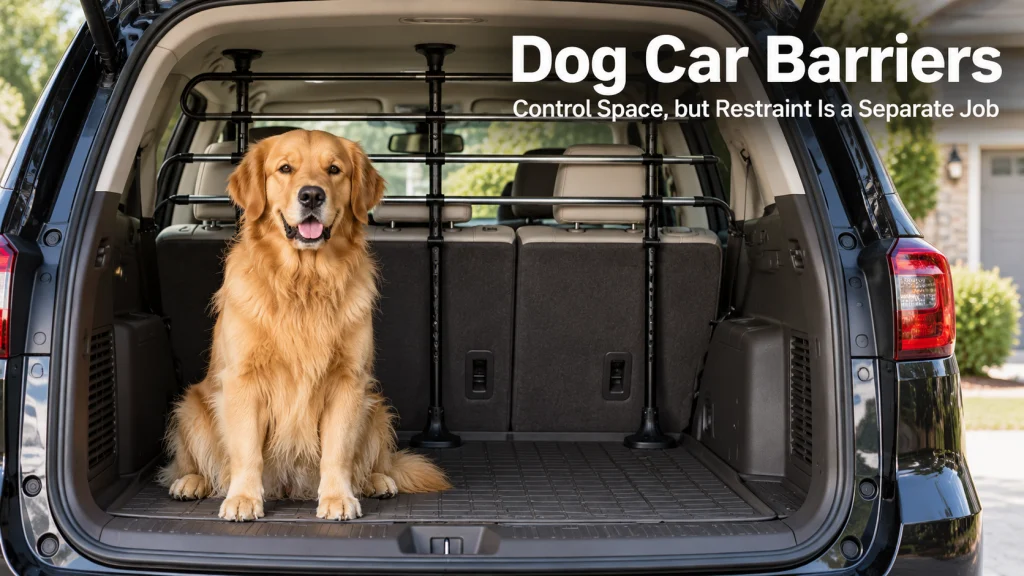
Decide which space the barrier must divide
A dog car barrier solves a location problem first: it helps keep the dog in one part of the vehicle instead of allowing free movement toward the driver or another seating area. That makes the first decision about cabin layout, not about which barrier looks strongest in a product photo. Start with the route, dog size, normal riding position and the part of the vehicle you actually need to separate. If you are still organizing the larger trip setup, our guide to traveling with a dog helps put the barrier decision in the context of the whole journey.
For routine vehicle setup, the barrier should fit into a broader dog car travel plan that covers where the dog rides, how the dog is secured and whether the chosen area can stay comfortable and usable. A large dog riding behind the second row in an SUV creates a different separation problem from a dog riding on the rear seat and repeatedly moving toward the center console. The barrier only earns its place if it divides that specific space without blocking the driver’s view or preventing normal use of seats, doors, vents or the hatch. That keeps the choice focused on the actual vehicle and dog instead of on a generic claim that one style fits every car.
Use rear seat and cargo barriers for different cabin layouts
A barrier behind the front seats has a different job from one placed between the rear seatbacks and an SUV cargo area. In a rear seat layout, the main question is whether the divider prevents forward movement while leaving the rear seating position, belt hardware, door access and ventilation usable. In a cargo layout, the opening may be wider, taller and shaped by trim panels, roof contours and folding seats. Measure the actual boundary you need to close instead of assuming a barrier labeled for cars or SUVs will match the geometry in front of you.
The dog’s size and behavior also change how much open space is acceptable around the edges. A calm dog that stays low in the cargo area may be contained by a layout that would not stop a taller or more persistent dog from putting its head or shoulders around the side. Openings near the floor, roof or trim can matter just as much as the main center panel. The useful comparison is not simply rear seat versus cargo area, but whether the installed shape controls the path your individual dog is most likely to use.
| Barrier location | What to verify | Common reason to skip |
|---|---|---|
| Behind the front seats | Seat travel, rear passenger access, center gap, vents and driver sight lines | The barrier interferes with normal seat use or leaves a route the dog can push through |
| Behind the rear seats | Cargo opening width and height, hatch operation, trim shape and side gaps | The vehicle opening is too irregular for a stable fit |
| Vehicle fitted divider | Exact vehicle compatibility, mounting points and seat configuration | The model or seat layout does not match the specified application |
Use the table as a screening tool, then confirm the details against the barrier instructions and the vehicle itself. A layout that is tidy on paper can still fail if a seat must move through the same space or the dog can reach an uncovered edge. That is why vehicle geometry comes before material thickness or appearance.
Compare installation methods by the vehicle, not by price alone
Tension fit, headrest mounted and vehicle specific barriers solve the mounting problem in different ways, so the better choice is the one that matches the surfaces and attachment points available in the car. A tension fit design depends on firm contact at the points described by its instructions and enough adjustment range to span the opening. A headrest mounted design depends on compatible posts, spacing and seat geometry. A vehicle specific design can reduce guesswork, but only when the exact vehicle model and seating configuration are actually included in the manufacturer’s fit information.
Price does not tell you whether those mounting conditions are present. A heavier frame can still be a poor choice if it cannot sit squarely, if its contact points land on unsuitable trim or if normal seat movement loosens the setup. A simpler design may be the more practical option when it can be installed correctly, checked easily and removed without disrupting the rest of the vehicle. Before buying, compare mounting method, available contact points, adjustment range, removal needs and how often your household changes the seating or cargo layout.
- Check what surfaces or hardware the barrier is designed to contact.
- Confirm that the adjustment method can reach the actual opening without improvised extensions.
- Make sure seats and headrests can stay in the positions required for normal use.
- Skip any installation that depends on forcing parts against trim or attachment points not approved for that use.
The goal is a repeatable fit that you can inspect, not the most complicated mounting system. If installation requires constant improvisation, the barrier is already creating a maintenance problem before the dog gets into the vehicle. Choose the method you can install correctly and recheck consistently.
Measure the usable opening and preserve normal vehicle function
Measure the opening where the barrier will actually sit, because trim, roof shape and seat angle can make the usable space smaller than the broadest cabin dimension. Record width at the intended mounting height, usable height and any side gap that changes as the panels or seats angle inward. Also note whether the hatch, seatbacks or headrests need to move through that space. These checks prevent a common buying mistake: choosing a barrier from a headline dimension while ignoring the shape of the opening around it.
Fit is only acceptable if the vehicle still works normally after installation. The driver needs a clear view, passengers need appropriate access to their seating positions and vents should not be unnecessarily blocked. A barrier should not force you to keep a seat in an impractical position just to maintain pressure or alignment. When the setup conflicts with routine vehicle use, a different mounting style or a different containment approach is usually more sensible than trying to make the barrier fit anyway.
| Measurement or check | What to record |
|---|---|
| Usable width | Width at the exact height where the barrier will span the vehicle |
| Usable height | Distance between the intended lower and upper contact areas |
| Edge gaps | Space near trim, roof, seatbacks and floor that the dog could reach |
| Vehicle operation | Seat movement, hatch clearance, door access, vents and rear visibility |
Keep these measurements with the barrier specifications while you compare options. The worksheet is useful only if you measure the location where the product will sit, not a nearby section that happens to be easier to reach. Recheck the space after any major change in seat position or cargo configuration.
Test ordinary movement and recheck the fittings after installation
Once installed, the barrier should feel stable in the normal directions a dog may push or lean against it. PetSafe’s support guidance for its tension fit barrier tells owners to confirm snug contact and apply mild hand pressure to check whether the barrier shifts, which is a useful example of the kind of model specific recheck an owner should follow. That does not create a universal test for every design, so use the instructions for the exact barrier you own. The practical goal is to catch loose fittings before road movement or the dog’s contact makes the problem larger.
Rechecking matters because installation can change after seats are moved, the barrier is removed for cargo use or adjustment hardware settles. Build the inspection into the moments when you already handle the setup, especially after reinstalling it. Look for movement, newly opened gaps, contact points that have shifted and hardware that no longer matches the manufacturer’s installed position. If the barrier cannot stay secure under ordinary use, stop relying on it as the divider and correct the fit or use another containment method.
- Confirm all intended contact points are seated as the instructions require.
- Apply the manufacturer’s recommended fit check rather than inventing a stronger test.
- Check that tubes, panels or mounting parts have not slipped out of position.
- Repeat the check after removal, seat movement or a change in cargo layout.
This routine is about ordinary containment, not crash simulation. Do not hit, load or modify the barrier in an attempt to prove impact strength at home. Crash performance requires evidence from an appropriate test, not a harder shove in the driveway.
Treat driver distraction control as a separate benefit from crash restraint
A barrier can be useful when its main success condition is simple: the dog cannot move into the driver’s space during normal travel. AKC guidance describes barriers as one way to help prevent a dog from jumping forward, and current PetSafe documentation similarly frames its metal barrier around keeping a dog out of passenger areas and reducing driver distraction. That is a meaningful benefit, but it describes where the dog can move during routine driving. It does not, by itself, tell you how the dog or barrier will behave under crash forces.
This distinction keeps marketing language from doing too much work. Thick bars, a rigid appearance or a snug vehicle fit may make a product look substantial, but visual strength is not evidence of impact performance. The correct question is whether you need normal cabin separation, crash restraint or both, then verify each job separately. If you need guidance on the restraint side of the decision, use our dog car safety guidance rather than treating the divider as a substitute.
Assume that a barrier that feels strong and keeps the dog in the cargo area must also be the dog’s crash restraint.
Verify the barrier for ordinary containment, then evaluate the dog’s crash restraint as a separate safety decision.
That distinction is especially useful when product copy blends containment language with broader safety wording. Treat routine separation as the benefit you can evaluate from fit and normal use, then move any impact claim into its own verification step. This keeps a useful barrier from being asked to prove a different job through marketing language alone.
Pair the barrier with an evidence supported restraint when crash protection is the goal
If your goal includes limiting crash movement, choose the restraint according to the dog, available seating or cargo position, vehicle layout and the type of system being considered. Center for Pet Safety currently lists certified products within categories such as safety harnesses, pet travel carriers and travel crates, so the restraint decision needs to stay tied to the product category and installation being evaluated. A divider positioned near that restraint does not automatically become part of the same safety system.
Keep the installation paths separate as well. A barrier may use roof and floor tension or seat hardware, while a restraint may depend on a seat belt path, anchor point or crate installation specified by its own instructions. Both systems need to work without interfering with each other or with normal vehicle operation. If adding the barrier makes the restraint impossible to install as directed, the combined setup is not automatically better simply because it contains more equipment.
Key point: A barrier and restraint only work well together when each can be installed as directed without blocking, loosening or compromising the other.
Think in terms of complete function instead of equipment count. The best setup is the one in which each component has a clear job and can be installed as intended. When one component compromises another, revise the layout rather than accepting a conflict that is hard to verify.
Verify crash tested or load claims for the exact barrier
When a barrier is advertised with crash tested, impact tested or load language, treat that wording as the start of verification rather than the conclusion. Look for the exact model, test configuration, test method, laboratory or organization involved and the result the manufacturer is actually claiming. A statement about a material, a related product or a different vehicle configuration does not automatically transfer to the barrier you are considering. If the evidence is too vague to connect the claim to the exact product and setup, keep the claim narrow.
Do not use the absence of a particular certification as proof that a barrier fails, either. Different organizations certify different product categories, and a product may have evidence that uses another test path or may have no relevant impact evidence at all. The safe editorial position is to report only what can be traced to the exact model and test information. That avoids both extremes: assuming every barrier is crash protective and assuming no barrier could ever have product specific impact evidence.
- Match the claim to the exact model number or product generation.
- Identify what was tested and how the product was installed during the test.
- Separate an independent certification from a manufacturer statement about testing.
- Do not extend a result beyond the configuration the evidence actually covers.
This is also where generic buying shortcuts fail. Material thickness, price and vehicle specific fit can affect ordinary use, but none of them replaces a documented impact result. If crash performance is central to your decision, spend more time on the evidence than on the product’s visual impression.
Choose a travel crate when full containment fits the vehicle better
A barrier is not always the cleanest way to manage the dog’s space. If the vehicle can accommodate a properly sized and appropriately installed travel crate, full enclosure may solve the containment problem more directly than dividing the whole cabin. That can be especially useful when a dog can reach around barrier edges, when the cargo opening is irregular or when the household frequently carries other items beside the dog. The crate still has its own fit, ventilation, installation and safety questions, so it should be evaluated as a complete system rather than as a stronger version of a barrier.
Vehicle space is the limiting factor. A crate that suits the dog may still be impractical if it blocks the hatch, cannot be positioned as required or leaves no usable route for loading and normal vehicle use. Our guide to choosing a dog travel crate covers that separate decision in more detail. If full containment fits the vehicle and routine better, there is no need to force a barrier solution simply because the original shopping search began with one.
Stop when the dog can dislodge, squeeze around or become entangled
A barrier stops being a workable containment tool when the individual dog can repeatedly move it, get around it or put body parts into gaps in a way that creates an entanglement risk. Do not answer that problem only by tightening harder or adding improvised parts that are not part of the intended installation. First confirm that the barrier is adjusted correctly and that the vehicle falls within the product’s fit requirements. If the setup is correct and the dog can still defeat it, the containment method is not doing its job for that dog and vehicle combination.
If a dog persistently pushes, climbs or panics around a divider, a stronger barrier is not automatically the right answer. The dog may need a different containment setup, a more appropriate travel arrangement or behavior help when the behavior itself becomes the main issue. The immediate owner level decision is simpler: do not continue driving while relying on a divider the dog can defeat. A secure routine comes from matching the containment method to the dog, not from escalating force against a setup that has already shown its limits.
Warning: Stop using a barrier that shifts, blocks visibility, interferes with normal vehicle operation or cannot contain the individual dog as intended.
That stop rule protects the quality of the whole travel setup. It also prevents a containment problem from being mistaken for proof that the dog simply needs a heavier barrier. Sometimes the correct answer is a different layout, a different containment method or no barrier at all.
Final Thoughts: define the space first, then solve restraint separately
A good barrier decision starts with the space you need to divide, the vehicle geometry you actually have and the way your dog behaves in that space. Measure before buying, install according to the exact instructions and recheck the setup after it has been moved or adjusted. Keep normal vehicle function in the decision so the divider does not create a new problem with visibility, access or seat movement. If the divider stays stable and prevents unwanted movement during ordinary driving without interfering with the vehicle, it is doing the containment job you chose it for.
Keep crash protection as a separate verification step. Do not infer it from weight, thick metal, a tight fit or broad safety language, and do not dismiss a product specific claim without checking the evidence behind it. When crash restraint matters, choose and install that system on its own evidence, then make sure the barrier does not interfere with it. The result should be a travel setup in which every component has one clear job and each job can be checked.
FAQs
🚗 What does a dog car barrier actually do?
Its main job is to limit where the dog can move inside the vehicle during ordinary travel. It can help keep a dog out of the driver’s area, but that does not automatically make it a crash restraint.
📏 How do I know whether a barrier will fit my SUV?
Measure the usable opening where the barrier will sit, including width, height and edge gaps. Then compare those measurements with the exact product instructions and confirm that seats, the hatch, vents and sight lines still work normally.
🔩 Is a tension fit barrier better than a headrest mounted barrier?
Not universally. The better choice is the mounting method that matches your vehicle’s actual contact points, adjustment range, seating configuration and normal use without requiring improvised installation.
🛡️ Does crash tested mean the barrier will restrain my dog?
Only if the claim is supported for the exact model and configuration in a way that actually covers that restraint job. Check what was tested, how it was installed and what result the evidence supports before drawing a broader conclusion.
🐕 What if my dog keeps pushing through the barrier?
First confirm the barrier is installed and adjusted correctly for the vehicle. If the dog can still dislodge or bypass it, stop relying on that setup and consider another containment method rather than simply applying more force.
📦 When should I use a travel crate instead of a barrier?
A crate can make more sense when full enclosure fits the vehicle better or when the dog can reach around barrier edges. The crate still needs correct sizing, placement, ventilation and any relevant safety verification for the exact model and installation.
References and Sources
- American Kennel Club car ride guidance: Supports the ordinary role of a barrier in helping prevent a dog from moving into the driver’s space and distinguishes that from securing the dog for travel.
- PetSafe Happy Ride dog barrier support: Shows a current tension fit barrier whose stated function includes limiting access to passenger areas and reducing driver distraction.
- PetSafe barrier installation guidance: Supports checking adjustment, contact points and installation for the exact barrier rather than assuming fit from category alone.
- Center for Pet Safety certified products: Shows the current certified product categories and supports treating certification as exact product evidence rather than a blanket claim about every travel product.